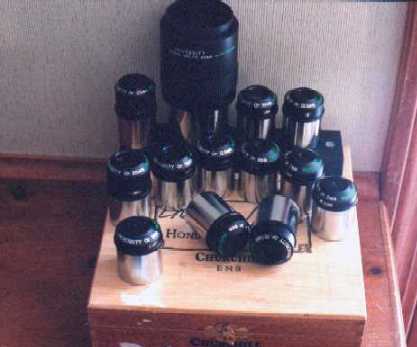
 Champagne sharpness on a beer-budget: The UO Orthos
(40 mm 2" Konig MK70 in back row)
Champagne sharpness on a beer-budget: The UO Orthos
(40 mm 2" Konig MK70 in back row)2) University Optics Orthoscopic Eyepieces (4,5,6,7,9,12.5,18,25 mm models, $55.95-$59.95 each) For reasons which are not entirely clear to me, orthoscopics have fallen out of favor lately. Observers and manufacturers have flocked to Plossls; in fact, it's safe to say that the Plossls are now the "standard" eyepiece. University Optics is now almost alone in championing the venerable orthoscopic. Employing a four-element design, orthos are just as sharp, on axis, as any competing design you care to name. The field of view is smaller than on a Plossl, but the eye relief is usually longer.
Champagne sharpness on a beer-budget: The UO Orthos
(40 mm 2" Konig MK70 in back row)I spent some time with several of these, and not once did I wish for my more expensive Plossls or Naglers. In fact, if you are primarily a planetary or double star observer, orthoscopics may be the best choice for you. They don't soak up as much light as the 5-8 element designs, and they're sharp. Drawbacks? The eye lens is small below 7 mm. The mechanical construc- tion isn't as solid as the TeleVue Plossls, or the Meade Series 4000 models -- they're light and small, and minimalist in design. They don't look as cool. The field of view (around 40-45 degrees) is small, compared to Plossls. But for the price (around $55-$60 each) I am not aware of any eyepieces which are sharper or more useful. I've been told by more than one observer who should know that these eyepieces deliver 90%-95% of the performance of the Zeiss Abbe Orthoscopics, at 25% of the price. Highly recommended. I have the distinct im- pression that I am going to wind up with a complete set. Update, 10/2/98: I had the opportunity to run a detailed comparison between the UO orthos and the TeleVue Naglers and TeleVue Plossls. The fact that I am running this test at all tells you how much I think of these eyepieces. I tested the UO 9 mm against the 9 mm Nagler, and the UO 12.5 mm against the 13 mm Nagler. I also had a TeleVue 10 mm Plossl handy, as well as a host of other eyepieces. The telescope was the Takahashi FS102.
All of the tested eyepieces are sharp. It surprised me that the Naglers were as sharp as the simpler designs (I expected the orthos to be slightly sharper.) However, this sharpness was not evenly distributed. The 10 mm Plossl and both UO orthos had impressive edge correction -- I could put Jupiter half-in, half-out of the FOV, and there was no distortion. On the Naglers, chromatic aberration crept in, and the planet looked elooongated, if you get my drift. To be fair, though, no one spends a lot of time looking at the edge of the field in a Nagler. I didn't notice any light throughput issues -- the Naglers threw up images of Jupiter and Saturn that were just as bright (and the same shade of color) as the simpler designs. There are two issues, however, that might sway one towards the Plossls or the Naglers. One is an "emotional" issue, the other might potentially be annoying. The emotional issue is simply that the Naglers throw up a huge, picture-window like view, with a giant eye lens, that makes you think you're out in space. You feel as if you're part of the scene. The Plossls have a much smaller 50 degree FOV, but it's still large enough to be involving, even if the eye lenses are small- er. The UO orthos, on the other hand, have a comparatively tiny FOV, and you are always aware that you are looking through a telescope at an object, rather than at the object itself. Now, some people just won't care about this, and will go for the orthos, due to their simplicity, inherent sharpness, and low cost. The bottom line is that the Naglers give you an emotionally-involving view, while the orthos tend to give you an accurate, more "clinical" view.
There is a more serious issue with the UO orthos, however. As the night drew on, I began to notice some annoying glare through the UO eyepieces on Jupiter at certain angles. This was also true, looking at the moon. Examining the eyepieces in daylight reveals why. Turn your eyepieces over. On more expensive units, there is a field stop, or a baffle around the lens area. The Panoptics, Naglers, and Plossls (25 mm and under) all have these baffles to shield stray light. The UO orthos, while they do have blackened edges and threads, do not. This allows some stray light to enter the lens, and can cause some glare. Note that this problem only occurred at certain angles and eye positions, and only on Jupiter and the moon (Saturn isn't bright enough) but it happened just enough to be annoying. I think UO should redesign its orthos with some sort of baffle. The eyepieces are so inherently excellent, optically, that I believe it would be worth the effort, even if they had to charge more for them. ...And yes, I am still thinking of acquiring the whole set.
3) Book: Telescope Optics (Harrie Rutten and Martin van Venrooij, $24.95, Willman-Bell) Every telescope-loving astronomer needs this book. The authors meticulously go through just about every telescope and eyepiece design imaginable. The best parts are the spot diagrams showing you exactly what happens to the star image when it reaches the focal point, using various telescope designs. There's enough drawings, diagrams, and formulae to keep you busy for a lifetime. Highly recommended.
4) Book: Star Testing Astronomical Telescopes (HR Suiter, $24.95, Willman-Bell) Star testing your telescope is so easy, everyone should learn how to do it. The test is so simple, sensitive, and fast, you should do it every time you take out your telescope. Yet, only a few years ago, no one knew how to properly conduct a star test. Enter Suiter's book, which has taken the hobby by storm. Suiter uses computer- generated images to show you how to recognize various aberrations. Then, he supports these images with exhaustive data and analysis. With some study, this book is going to turn you into an optical expert. A confession: I have, on more than one occassion, fallen asleep dreaming about telescopes with this book in my lap. An essential text. 5) Pentax 7 mm SMC-XL eyepiece ($432 list, about $325 street) The Pentax eyepieces share a similar design philosophy with the Naglers. They're large, premium eyepieces, with a generous (65 degree) field of view. There appears to be a small barlow built in to the bottom of the eyepiece, just like on a Nagler. The SMCs are beautifully-made, huge and heavy, with a screw-up rubber eyecup that looks like an upside-down funnel. I am not sure if they will fit in "tight-space" telescopes like the ETX or the Questar. I finally got a chance to A/B this fine eyepiece with the 7 mm Nagler. The Pentax surprised me. It had less chromatic aberration, and seemed slightly sharper as well. Also, the SMC has twice the eye relief - 20 mm vs 10 mm. You pay for all of this, of course. The Pentax costs a whopping $100 more than the already-expensive 7 mm Nagler. If you're seeking the ultimate performance in a cost-no-object eyepiece, look no further.
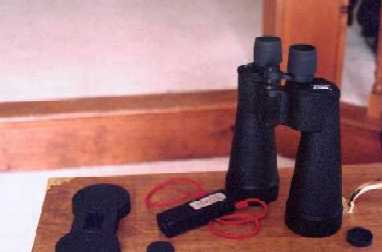
6) Pro-Optic 11X70 binoculars ($199.95 list, $159.95 street)
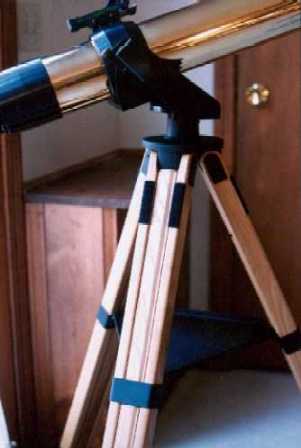
7) TeleVue Gibraltar Mount (Alt-Az mount, in ash -$475 street- or walnut/brass -$600 street-)
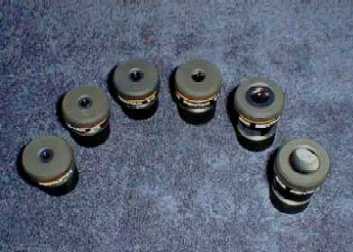
8) Pentax .965" Orthoscopic Eyepieces These are superb quality eyepieces that will make you rethink what's possible within the .965" format. They're sharp to the edge, have an acceptable 40-45 degree FOV, and are beautifully-made. I am told you can order them through any authorized Pentax dealer.
9) Kasai 30 mm 2" Eyepiece A rare specialty item. Designed in Japan, the Kasai is a clone of the 30 mm, 88 degree FOV Leica eyepiece ($1600.) The Kasai offers even more FOV (90 degrees!) and does so for less than half the cost.
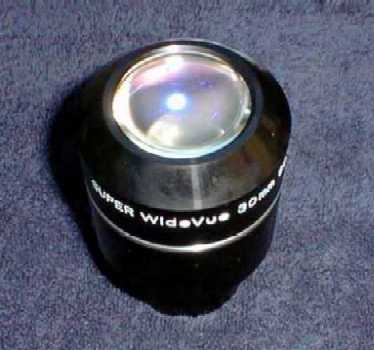
In actual use, you notice two things right away. First, on popular showpiece objects like the Double Cluster or the Pleiades, there is a "holy cow!" feeling as you pan your eye around inside the eyepiece, trying to catch the whole view. However, there is significant distor- tion near the edges. Aberrations creep in at the outer 20% or so of the FOV. It reminds me of the edges in a pair of cheap binoculars. There is no "magic" to building a super-wide FOV eyepiece. Al Nagler once showed me how to make your own 100 degree FOV unit: unscrew the barlow from the bottom of a Radian. The challenge is making a wide FOV eyepiece that's sharp to the edge. I'm not sure if an eyepiece like this (or the Leica) is a necessity, but everyone should at least get to look through one at some point.
10) Orion Accu-Track RA Drive ($99 add-on RA drive that fits many mounts) I have been looking for an excuse to write an essay about these third- party add on RA drives. The recent purchase of one of these Orion Accu-Tracks allowed me to revisit this topic. Astronomers tired of hand-tracking celestial objects often turn to these generic motor drives. However, it is more than simply a matter of dropping your money (usually around $100) attaching the unit, and sailing off into the sunset.
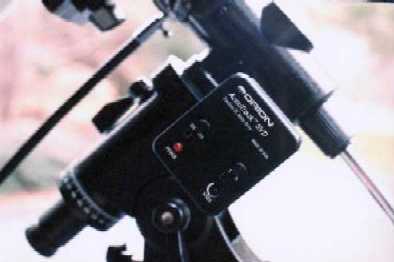
On a Super Polaris for example, you CANNOT use the slo-mo cables while the motors are on and the clutches engaged -- attempting to do so will cause damage. So, you need to keep straight in your mind whether the slo-mos are active or not. I've removed the RA cable from my mount temporarily, to avoid unhappy accidents. 5) FIFTH, all motors generate some vibration. At high powers, you may see the image "buzzing" back and forth due to this vibration. Mine isn't bad at all, but I've seen some really lousy ones. 6) SIXTH, if your unit uses a 9V battery and you live in the frozen north (as I do) you will find that these little batteries don't like the cold. They stop putting out the juice just when you need it the most. To add insult to injury, just when you get them inside where it's warm, they sometimes start working again. Also, these 9V batteries do not always output a steady stream of voltage and current. Factor in the rapid temperature and humidity changes we often experience in this hobby, and you'll find yourself making lots of adjustments to the speed control through the course of the night. If you can get all of this straight, the results are worth it. Not everyone will experience all of these issues, but at some point they may creep up. Just beware, and have some patience. This is the price you pay for con- venience.
End Various Eyepiece Review, Page 3