Can You Tell the Difference Between Field Flatteners?
By Ed Ting
Updated 10/1/16

By Ed Ting
Updated 10/1/16
Everyone knows the quality of your scope, mount, camera, and autoguider make a huge difference in your astrophotos, but what about your field flattener? The easy thing to do is to simply buy the recommended field flattener from the scope's manufacturer, but in perusing the market, some of these models appear to be brand-labeled versions of the same products, and if you shoot with expensive telescopes like APs or Taks, their field flatteners can cost a minor fortune. What would happen if you put a cheap, mass-market field flattener into an expensive telescope? Would anyone know the difference? I wanted to find out.
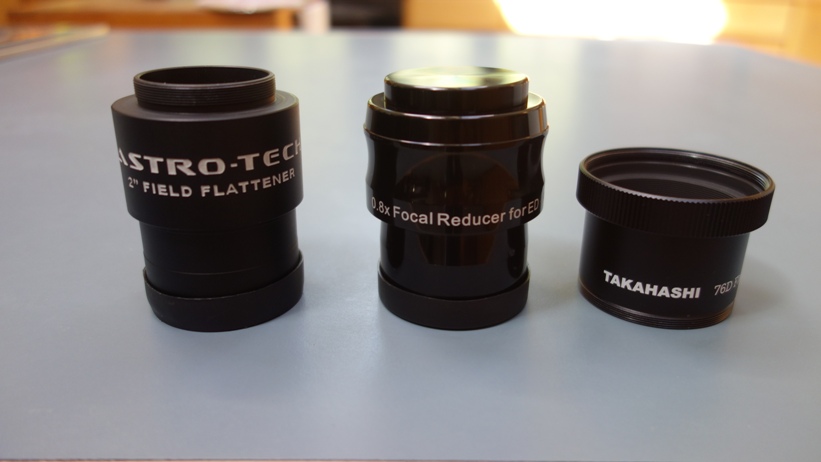
I have three FFs I've been using for the past year or so. From L to R, they are 1) Astro Tech part #ATFF ($150, named S&T Hot Product of the Year 2010), 2) Astro Tech .8 reducer/flattener, part #ATR8 ($120, also sold under the Orion name), 3) Dedicated Takahashi FC76 flattener ($224.)
Takahashi
makes many field flatteners and reducers, and
"It's designed for any refractor with a focal ratio between f/6 and f/8. And there are reports that helps flatten the field of Astro-Tech Ritchey-Chrétien astrographs. The flattener was reviewed in the September 2009 issue of Sky & Telescope, page 38. The Astro-Tech 2” field flattener has been designed to optimize the flat-field imaging performance of Astro-Tech and TMB apochromatic refractors, even the very fast f/5.5 focal ratio TMB-92. However, the field flattener will also work well with any other brand and type of f/6 to f/8 focal ratio refractor."
There's nothing stopping you from putting the ATFF field flattener into any scope, of course, and that's what I've been doing for the past year. I've used in in the FS60, FC-76, FS-102, the AT-72, and even the little AT66. It yielded very good results in all these scopes, and I won't hesitate to use it again in any other refractor I come across in the future.
Deep sky astrophotography is not easy. It took me twenty years, on and off, to get to this point, and I still have a lot to learn. Within my club alone, for example, I would rank myself as an intermediate. However, I've found it a pleasant diversion. I often leave a photography rig running on the side while I'm observing, doing a skywatch, or teaching. Field flatteners are not for visual use. The 2" nosepiece fits into your telescope's focuser like an eyepiece, but the other end terminates in T-threads that screw into your camera's T-ring (in the case of the Tak flattener, the "nosepiece" threads directly onto the scope's visual back.) If you're using a Takahashi and don't have the Camera Angle Adjuster (CAA) you have no choice in how your camera gets oriented.
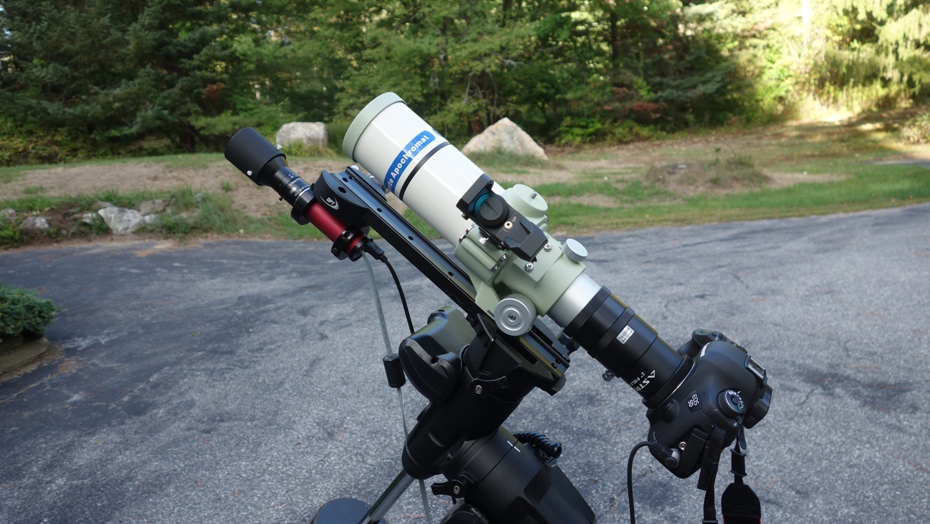
My usual rig is pictured below. The scope is an FS60. I use an AVX mount with an SBIG STi autoguider mounted on the same rail as the scope. I have a modded Canon EOS 5D Mark 3. An old laptop runs PHD guiding. An intervalometer takes exposures automatically at regular intervals. I stack the raw images in Deep Sky Stacker, and post processing is done in and old copy of Photoshop CS3. My skies are decent but steadily getting worse as civilization expands into rural southern New Hampshire. On a good night, I can just make out the seven stars in the Little Dipper, and I suspect some of those will disappear soon. I have my own little ritual for aligning the Goto, focusing the camera, and calibrating the autoguider that (on a good day) takes me about 25 minutes before I start shooting. Once I'm going, I usually try to get at least one hour's worth of frames. At the end of the session, while I'm breaking stuff down and packing it away, I'll have the camera do darks. As I was testing three field flatteners that night, I tried to keep as many variables constant as possible, and I didn't finish until about 1 AM.
Producing
a flat, distortion-free, non-vignetting image from a short f/5.9 refractor, and
having the image fill a full-sized DSLR sensor is a tall order, and I didn't
expect any of the field flatteners to emerge unscathed. All produced very
good images, and I'm hanging on to all three of them. But there were some
differences, and one model stood out from the rest. I used all three
flatteners on the night of September 24th, 2016 from my driveway.
This was an exceptional night, one of the best of the year, and I was up well
past midnight capturing these images. I picked the North America Nebula,
as Cygnus was directly overhead. The North America has become
"my" object, as I've taken so many images of it, and have a good
understanding of what it takes to capture it.
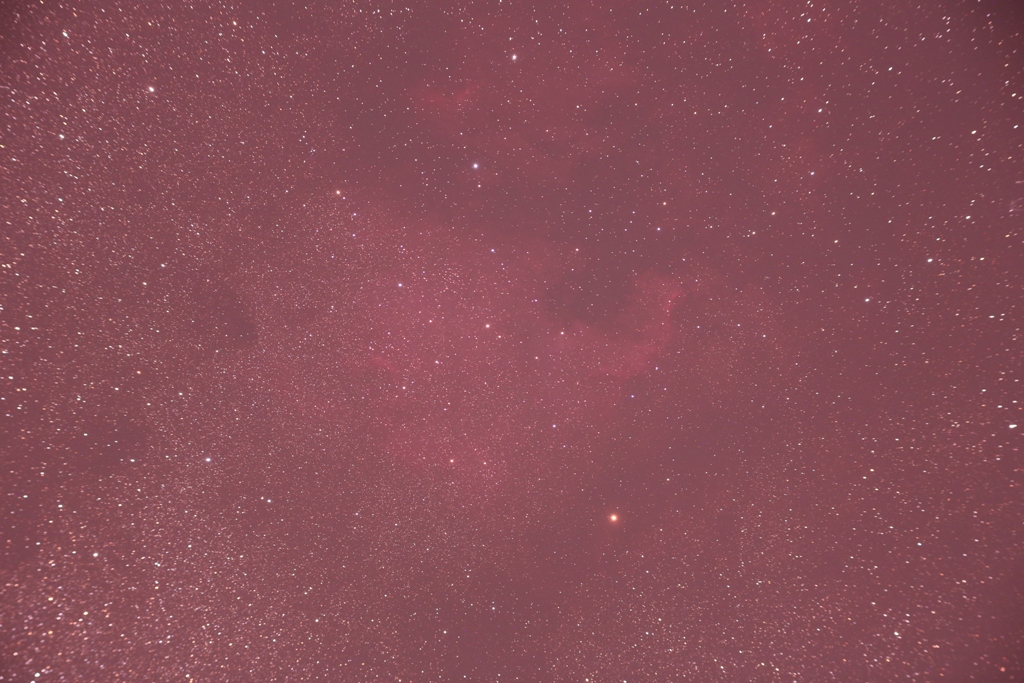
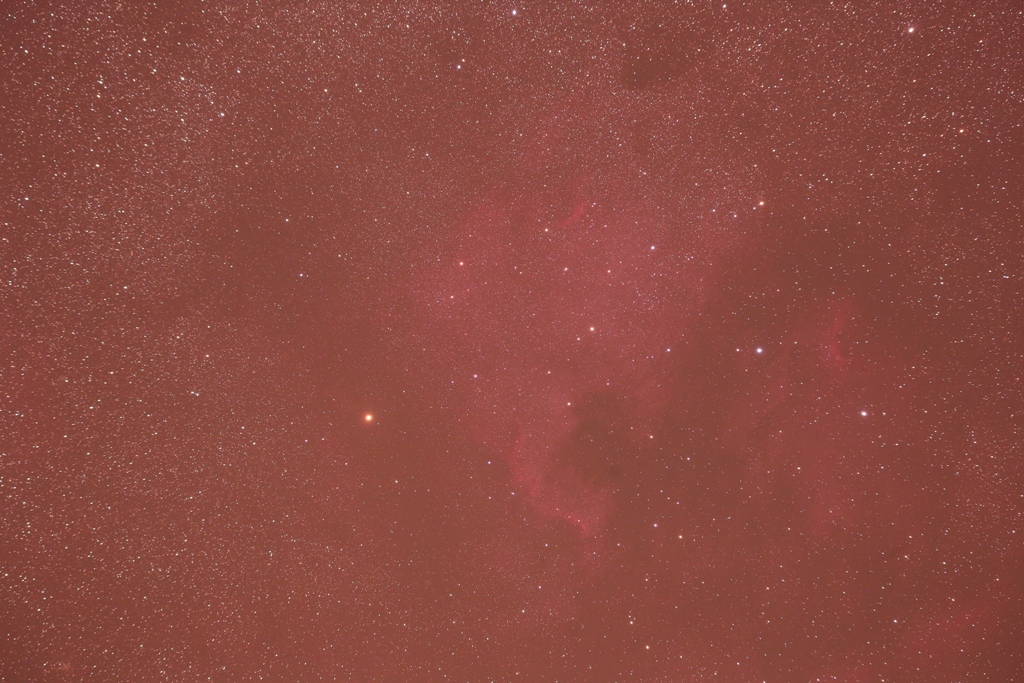
The
Raw
frames. These are sample 3 minute subs taken at ISO 1600. The
original images were taken in raw; what you see here are reduced jpegs. If
you want samples of the full raw files, contact me.
1) Astro-Tech $150 flattener. Not bad, but you can see some distortion as you get out to the edges. If you've never seen raw images like this, I can tell you, this is actually pretty good. While the final image will have to be cropped, the vast majority of this field is still more than usable.
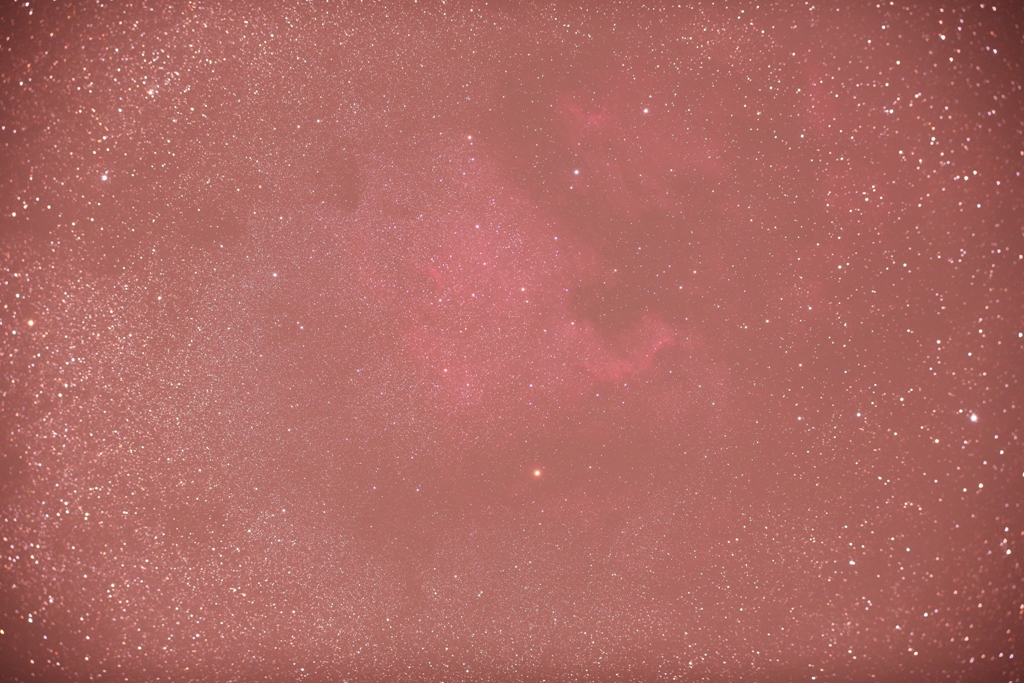
3) Takahashi flattener. Nice. The stars are nice and tight, and although there's still some inevitable distortion near the edges, it isn't as bad as with the other two flatteners. There's only minor light falloff near the edges. This results in a much larger usable area. I could tell even before doing any processing that this one was going to wind up looking good. By the way, as this flattener screws on to the visual back of the FS60, and since I don't have the Takahashi Camera Angle Adjuster, I had no choice in how the camera gets oriented. Luckily in this case, at least the North America is standing straight up. If you don't have the CAA, this might be a minor detriment to potential photographers.
One thing that interested me is even in these raw frames, there are differences in color rendition, something that would show up again in the finished images.
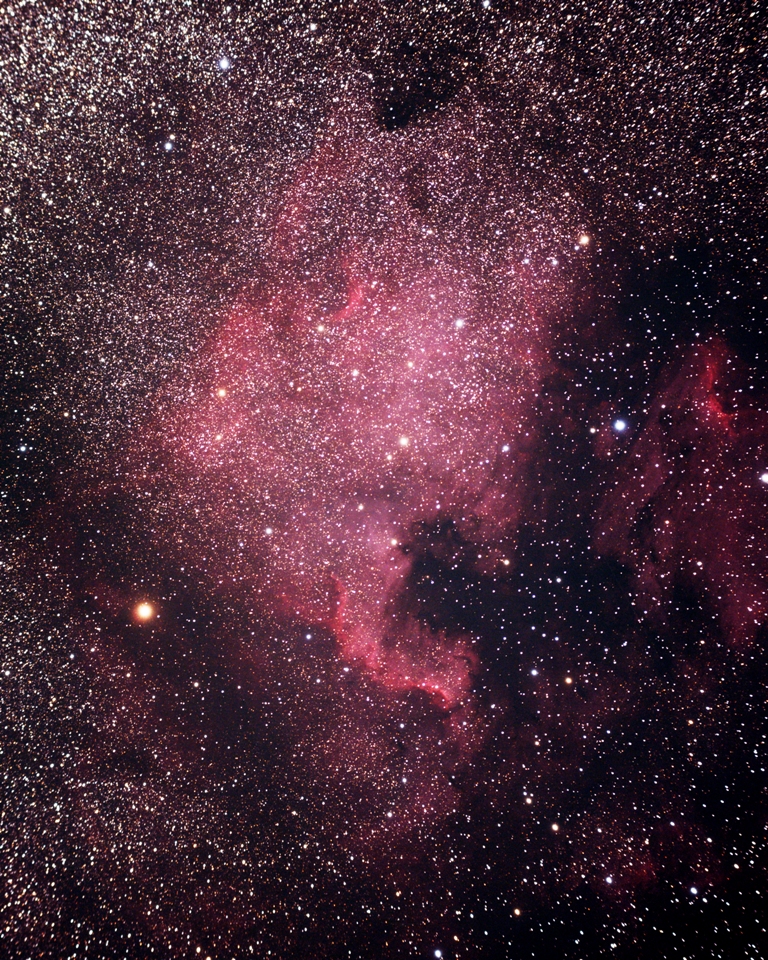
1)
Astro-Tech $150 flattener. Not bad! Only when you look in the
corners do you start to see some curved stars (I probably should have cropped
this one a little more.) I like the color rendition.
2) Astro-Tech $120 reducer/flattener. Again, not bad. Its main advantage is the increased field, and it's impressive just because of the huge amount of sky you can see
. The reduced f/ratio pulls in some of the dimmer stuff. But I had to crop almost 1/3 of the frame just to get rid of the curved stars. Also, the color rendition is a little mono-chromey. No matter how I fiddled with the color balance (Control-B in Photoshop) I couldn't get the color away from this medium-red that you see here. The stars also seem a little bigger than in the other images, at least partly because of the aggressive cropping I had to do. Still, I think this looks pretty good.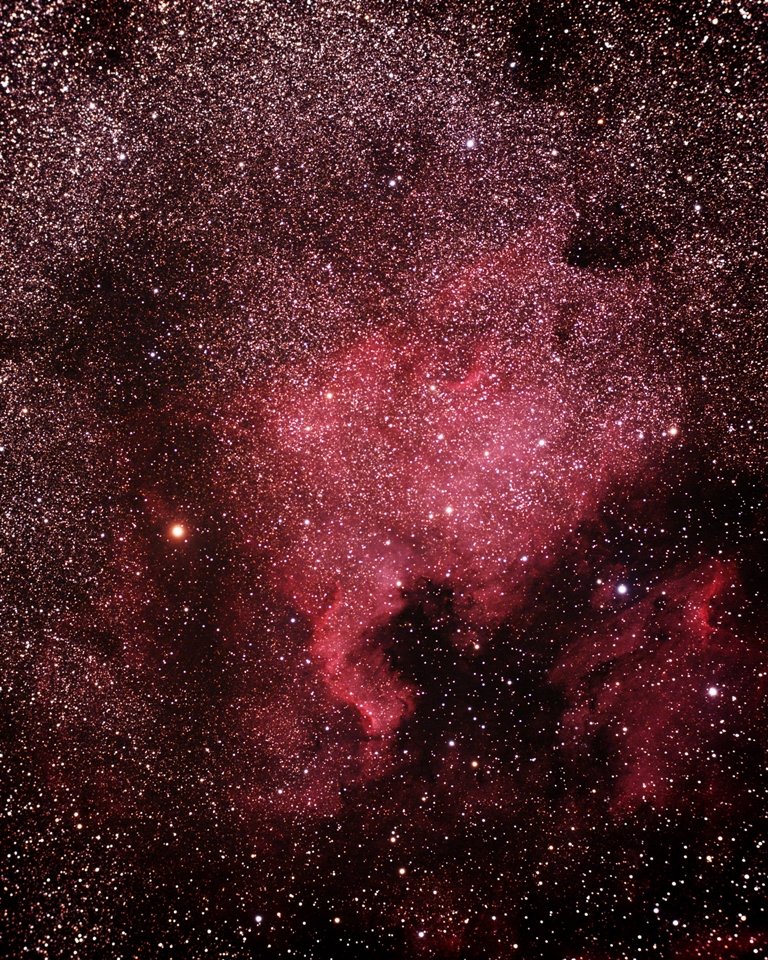
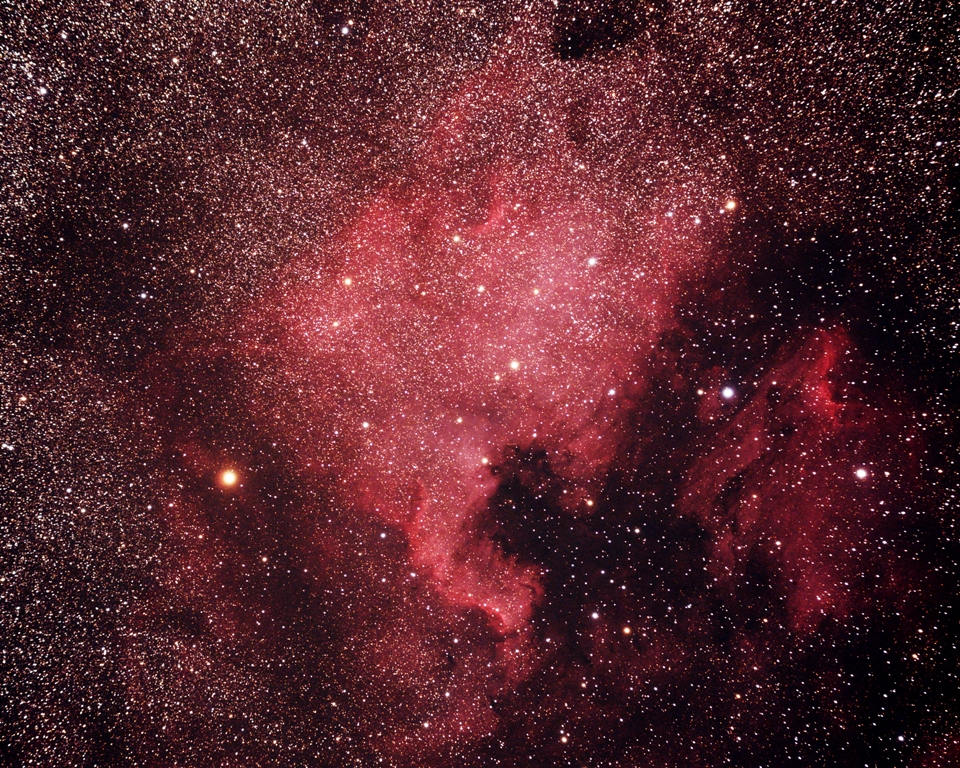
3)
Takahashi $224 dedicated flattener. The best combination of field
flatness, natural color balance, and tight, sharp stars. Although there
are some curved stars in the corners (look at the upper left for example) I
hardly had to crop the frame at all. If I had to spend time looking ay any one
of these images, it would be this one.
So it's not surprising the Tak flattener works the best. It's designed for the scope, and it costs the most. But you can't use it on other scopes, as it's threaded for Takahashi visual backs. If you shoot a lot and have a variety of scopes, the $150 Astro-Tech flattener is a very good deal. I use it more than the other two, and I hope to try it out soon on a fast Newtonian. While the .8 reducer/flattener is a bit behind the others in performance, it's still pretty good, and photographers will appreciate the reduced exposure times. It's also the cheapest of the three at only $120. The one big surprise I found was the difference in color rendering. For kicks, I restacked and reprocessed all three sets, and while there were minor differences the second time around, the color palettes stayed within the same general neighborhood. So the field flattener does make a difference. There are also several promising models I haven't seen, from Stellarvue, Williams Optics, Orion, and others. If I get a chance to test any of them, I'll report back.
Your move!
-Ed
End Field Flattener Comparo